
Our how-to guide breaks it down into ten easy steps.
by Sarah West
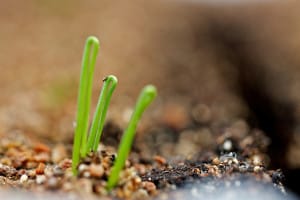
Source: Susy Morris
1. Shop, Prop + Prep
To get started, you’ll need seeds and some gear. Prop up your seed-starting shelf in a dry location that stays between 50 and 75 degrees. (Air hotter than that along with a heat mat can damage seeds.) The shelf doesn’t have to be near a window, though some sunlight helps.
Prepare a schedule: Consult an online planting chart to find out when to plant each variety outdoors in your area. Work backward from that date using the days-to-maturity information on the seed packet or catalog to determine when to start each variety indoors. This way, your seedlings will be the proper size at transplanting time.
2. Premoisten The Soil Mix
Fill a plastic tub half full with seed-starting medium and wet the top of the soil with a shower-spray watering can. Use both hands to mix the planting medium by scooping the top of it toward the bottom and back up again in a circular, fluffing motion. Keep spraying and mixing until a handful of soil oozes just a drop or two of water when squeezed. Then mound the dampened soil into the cell flats and spread it evenly across the top of the tray.
3. Level The Soil
Swipe the soil to level it. Lift the tray and drop it to compress the soil. Then top off and level any sunken areas. You want soil tight enough to transfer water between particles but loose enough to let roots move.
4. Make A Divot
Make a divot in the center of each cell using a chopstick. Check the packet to determine how deep to plant your seeds. Always start more seeds than you’ll use, so you can transplant only the healthiest seedlings.
5. Drop One Seed
Drop one seed in each divot. Pinch divots closed and press each gently. This establishes soil contact so the seed stays moist until sprouting.
6. Label Varieties
Label varieties with tongue depressors to keep track of what you’ve planted. Plug in the heat mats and place your cell flats, fitted with leakproof bottom trays, on top.
7. Mist The Flats
Mist the flats and cover them with a humidity dome. Check the soil a few times a day: It should be dark and moist, not soggy. Once most seeds sprout, remove the dome and heat mat. Fill bottom trays with ½ inch of water. Let the soil dry out slightly between waterings. Refill as needed.
8. Set Your Grow Lights
Set your grow lights 6 inches above the flat and keep them on for 14 to 16 hours a day. Turn them off at night; rest in darkness is important for proper growth. As the seedlings get taller, raise the lights, keeping them 3 to 6 inches above the tallest seedlings. Brown or crispy leaf tips mean the lights are too close. Stretched-out, spindly stems signal that lights are too weak or far away.
9. Remove Plants
Remove plants from cells once they have two or three sets of true leaves. Hardy plants, such as lettuce and onions, can go right into the garden. Warm-weather ones like tomatoes do better in a larger pot indoors under lights until well after the last frost. A balanced organic fertilizer in the transplant soil mix keeps seedlings healthy and vigorous.
10. Harden Off Plants
Set plants outside in dappled sunlight, sheltered from wind for 1 to 2 hours on the first day, and then increase outdoor time by 1 hour each day. Acclimate plants to sunlight by gradually moving them into a sunnier spot after a few days. Transplant starts after about a week of hardening.
The post Grow Healthy Plants From Seedlings Every Time appeared first on Cornucopia Institute.